Tuesday, August 10, 2010

For Joan

This latest installment is for my good friend Joan.  Yesterday evening I was still reeling with dog issues when she called and rescued me from my turmoil.  So, as promised, here is the recipe for my vegetable napoleon.  These kind of dishes vary from chef to chef.  With this particular dish, try to use tender veggies. If you use root vegetables, blanch them in boiling salted water first.  Either way, this is a solid dish to prepare in little time.

First, I love to start with caramelizing one red onion.  You can slice it any way you want as long as it is thin.

Use a small saute pan without oil and bring to high heat.  Many people use non-stick pans but.... they suck.  The trick is to bring the pan to a high temperature before adding oil.  Metal is porous and ragged before heating.  Applying heat expands metal and closes all those little jagged parts for a smooth surface.  At that point add your olive oil.


Now for the fun part!  Add the onions and quickly lower the heat by half.  All stovetops vary, you just want a light hissing sound.  This process will take about fifteen minutes or so.  During this time occasionally move the onions around to prevent scorching.


When the onions start to have a pink hue and the edges are a solid brown, turn the heat off but leave the onions there.  They will continue to cook for a few minutes without having to worry about burning them.

That is the component for at least two layers in the napoleon.  Next, I have some very fresh squash and zucchini from the Intervale.  You can slice them into thin rounds, but today I used my mandolin to make zucchini and squash noodles.

This will add that tender crunch we all love.  A Japanese mandolin is a prized piece of equipment in any kitchen, especially for veggies.  Next, I had a bunch of crimini mushrooms in the fridge.  This will add a nice earth flavor.  As before, slice thin and saute in a little olive oil.  This has a twist.  I usually open a nice bottle of wine (sauvignon blanc)  and pour a glass.  After a few minutes the mushrooms need a drink too!

I have to admit.  I cheated a little for this next part.  I love roasted peppers, but a good product in a jar is more than adequate.  That's it! Everything is done.  Now comes the fun part!  For this I used a ring mold.    I have had this for years.  If you go to Home Depot and buy a piece of aluminum tubing cut into 4" pieces, this will save some time and enhance appearance.  Press in the onions and mushrooms with a spoon.


Add the squash, zucchini, mushrooms and peppers to form distinct layers.  Today I used fresh pesto and sundried tomato tapenade.  These work perfectly with the ingredients.  To get the "stipple" effect hold the spoon at least a foot above the plate and pour slowly.  Use a spatula to hold underneath the ring mold and place in the middle of the design.  You can top with some baby salad greens.  I know it seems like a lot, but when you put it in perspective it's not.


Thanks again Joan!  You really helped me yesterday.  I hope you enjoy the recipe!  Let me know if there any questions.

Saturday, August 7, 2010

Dilly Beans and Fresh Bacon

Today was one of the nicest days of the summer. Even the sunlight seemed different today. Here in Vermont you definitely can feel the season changing. This morning I took out the motorcycle and saw so many trees starting to change color on Appalachian Gap. Afterwards I went for a bicycle ride on my favorite trails and witnessed the same here in the Champlain Valley. The air was right.... Today is a great day for playing in the kitchen. I had two pounds of fresh beans from Lewis Creek Farm and of course pork belly. First, I love dilly beans. Seriously, I turn into Tyrone Biggums looking for some rock if I don't have it at least once a year. These are so easy! Everyone should be making them. Here is my recipe....

Dilly Beans

-2# Fresh Green/ Yellow Beans
-4 Cups Cider Vinegar
-2 Tablespoons Kosher Salt
-4 Garlic Cloves, Sliced
-8 Sprigs Fresh Dill
-1 teaspoon, Red Pepper Flakes

First things first. Have a large pot of water on the stove over high heat. There is nothing worse than waiting for water to boil. They say a watched pot never boils, but I disproved that theory today. It will eventually boil.


Make sure you snip the little stems off the beans, and gather your ingredients before you blanch them.


Blanch the beans for about 3 minutes and quickly transfer them to an ice bath to stop the cooking. Take the vinegar and remaining ingredients and place in a small sauce pot and bring to a boil.


If you dont have your jars already free from bacteria, place the cleaned jars in the oven at 200 degrees for a few minutes before packing them. When you're ready pack the jars with the blanched beans and dill.


Make sure the jars are not overfilled. If so the jars won't seal properly, or worse, break. Place the lids on and gently tighten them. While the jars are hot, rev up the canner! Holy CRAP! As I am typing this a hot air balloon just crashed in my backyard!!! That is strange! Well, the fire department can deal with a basket full of tourists. Back to the beans!

When the water in the canner has come to a full boil put the jars inside and process them for twelve minutes. Carefully remove the jars and let cool on your countertop. Put them in your pantry and enjoy!


Next project was fresh bacon. Two of the greatest ingredients in life are fresh bacon and good olive oil. Fresh local pork belly=GOOD BACON!!

***Balloon Update... They are out of my trees and stuck in the neighbors yard.. Good!***

The dry cure mixture for bacon is....

Basic Dry Cure

-1 Pound Kosher Salt
-8 Ounces Granulated Sugar
-2 Ounces Sodium Nitrate

Mix all of the ingredients listed well.


To make this bacon extra special, you have a few options. My favorite is adding three sliced cloves of garlic and 1 tablespoon of cracked black pepper.

Dredge the pork belly in the salt and sugar mix and rub the cure mix in with your fingers. After, add the black pepper and garlic and work that into the belly.

You will have at least one quart of dry cure mix leftover. Save this! You can use it on many cuts of meat. It especially works well on pork ribs. Let the bacon sit in the fridge for nine days. Once its ready, hang on to your socks! Or, you can freeze it for three months, but why torture yourself!


Bacon truly is the gateway meat!

Thursday, August 5, 2010

Back In Business!!


Last Saturday I was milling around Healthy Living Market in So. Burlington. Their meat department is outstanding! The first prize I saw was a pile of fresh pork belly from Settlers Farm here in Vermont! Well....I fought off about one million screaming Chinese women and cleaned them out! I'm sitting on about 60 pounds of pork belly! Woo Hoo!!!!! Ok, Pancetta is first on the hit list! Pancetta is basically Italian Bacon and is great to use in EVERYTHING!! It is basically pork belly cured with salt , seasonings and then dried for a week or two. If you are fortunate enough to get your hands on fresh pork belly keep this recipe in mind! Here's what you need......

3 Garlic Cloves, Minced
1 teaspoon Sodium Nitrate
1 ounce, kosher Salt
1 Tablespoon Dark Brown Sugar
2 Tablespoons Crushed Black Pepper
1 Tablespoons Juniper Berries, Crushed
2 Bay Leaves, Crumbled
1 teaspoon Nutmeg, Ground
3 Sprigs Thyme, Chopped
2.5 # Pork Belly

Get everything together..Mise en Place yo!


First thing is to cut the amount of black pepper in half and reserve. Mix all the seasonings together and liberally coat all sides and work it into the meat.


At this point you can either wrap the curing pancetta in plastic wrap, or you can seal it in a Foodsaver bag.


Let this sit in your fridge for seven days. Every day carefully flip the bag over to redistribute the brine. The meat should firm up as it looses moisture and takes on the applied seasonings. When the days have past, remove it from the bag, rinse with cold water and rub in the reserved black pepper. Let this sit uncovered in the fridge for three days. Drying pancetta helps the texture, intensifies flavor, and makes it last longer. Here is where you should be at after seven days.....


I'll update this blog in the later stages of the curing process. Stay tuned!!

Ok, todays project was dinner. The options at this point are wide open. I felt the strong urge to fire up the smoker. The options were short ribs, salmon, scallops, beef back ribs, pork loin or chicken. They all drew straws and chicken won! Before you attempt this, first buy a good smoker. I'm very particular about smokers and will never buy a gas model. It doesn't seem right!

For this I used a local split whole chicken. Not only is this dinner for tonight, but great for leftovers..Hmm...Chicken salad with champagne grapes!!!! First, take the bird and coat it lightly with blackstrap molasses.
Next lightly sprinkle maple sugar all over the bird. After that crush about one tablespoon of black peppercorns and work that into the mixture.


You definitely need some heat with this bird. Sriracha is a welcome addition to smoked maple black pepper chicken.

The Money Shot!

As soon as you're done grab two chunks of your favorite wood to smoke with. In my case it is fresh apple. Take the wood and submerge it in a 50/50 split of vinegar and water until saturated.
Let at least thirty minutes pass before you light your coals. Add the soaked wood to your hot coals and close the damper almost all the way. Once it starts smoking, place your little lady in waiting on the other side of the grill for indirect heat.


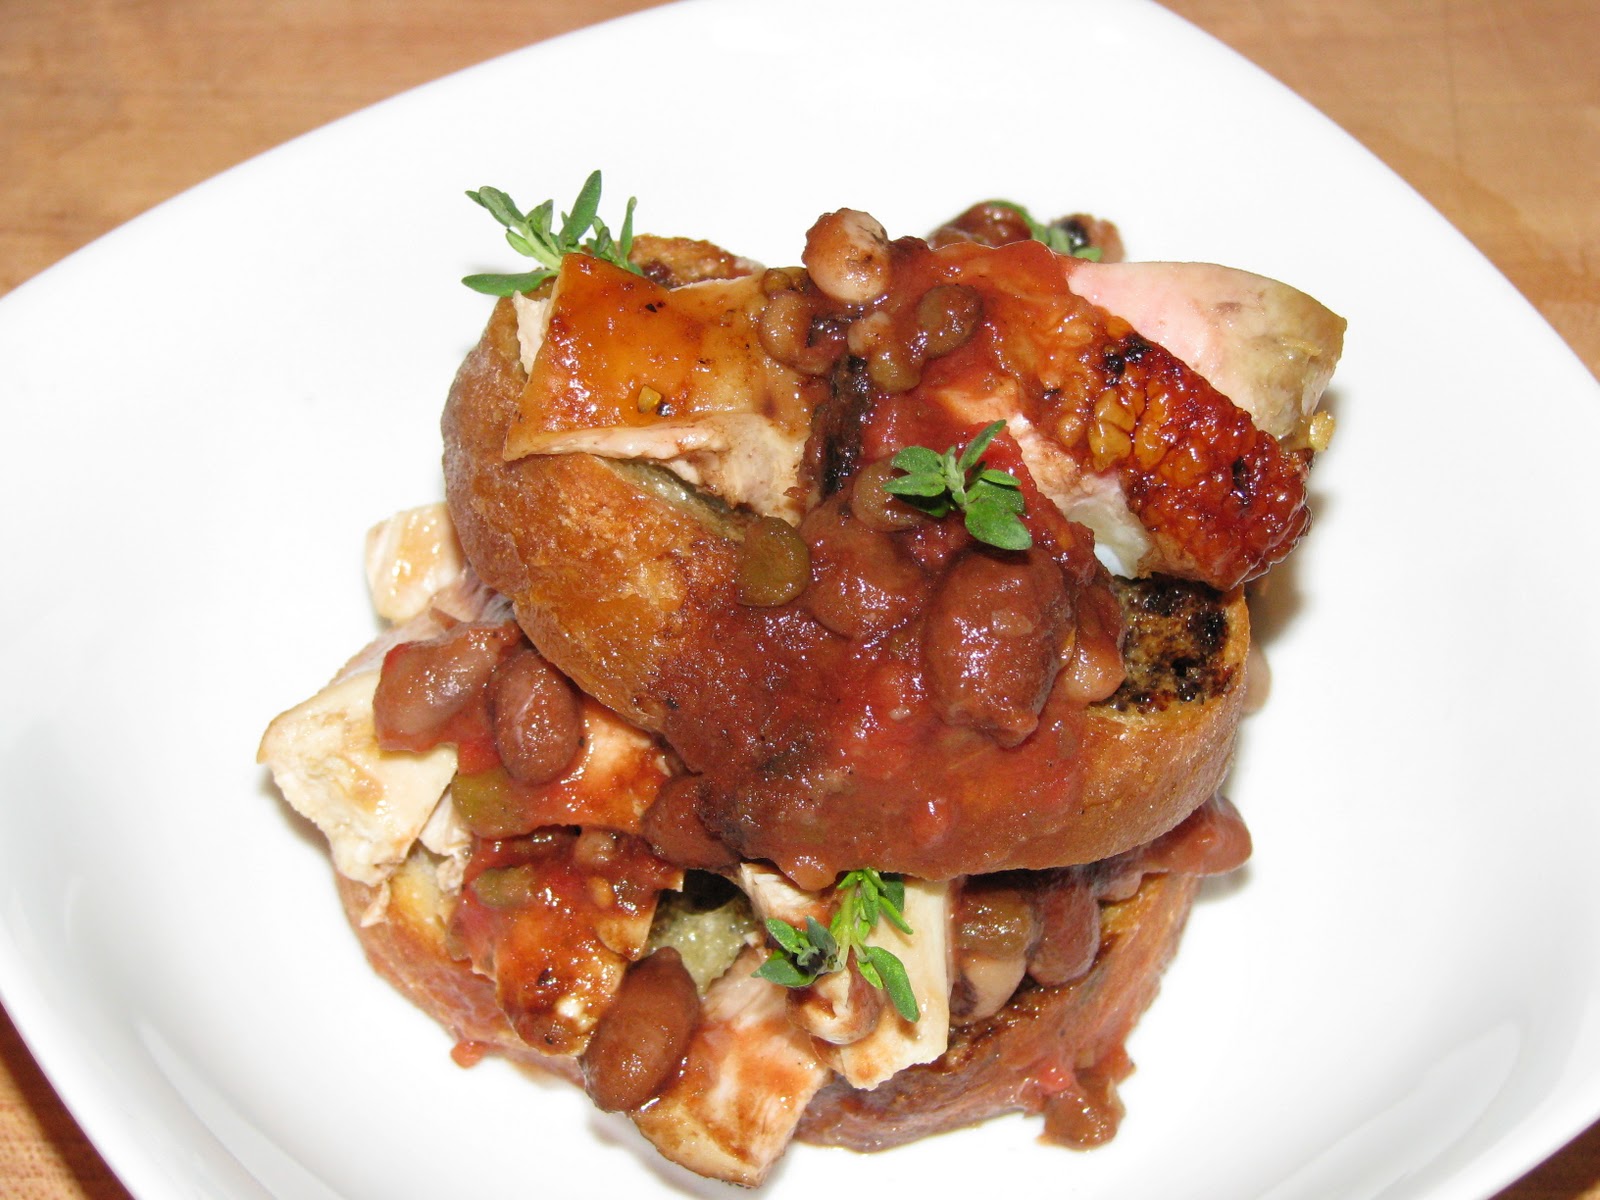
Make sure that the bird is fully cooked. It took about 40 minutes at 230 degrees. For tonight while this was cooking I made a quick bean ragout and toasted baguette.


It is well worth the effort! I'm still eating this while typing and enjoying every minute! It's so good that time seems to stand still. It's funny how food can do that to you.

-Peace

Friday, July 23, 2010

The Saga Continues....

This year has been very strange for me. Living arrangements have changed so rapidly that I have a hard time figuring out what to call home. The last time I felt this way was ten years ago when I was living in Park City Utah. I remember meeting my new housemate, extending my hand in friendship, and hearing him say," I don't associate with dreadlock hippies!" What? I drove all the way out here for this? He wouldn't even shake my hand! Even better than that, he was my boss at The Canyons! That was a tough winter. This was also a great learning experience for me. I learned a lot about overcoming the mannerisms of negative people and locations, and transforming them into a positive life experience. After a while I traded in the housemate dilemma and moved into the woods. I loved it! Waking up with the sun in the morning and getting a panoramic view of the Uinta mountain range was unforgettable. Guerilla style living has its benefits. These past thoughts have given me so much positive thinking about my current situation.

While looking for a house, I have been at an Extended Stay battling unruly tourists, drunk bridesmaids, super aggressive children (scary), and Brittany. Brittany is the alcoholic, chain smoking bag lady friend I never had. This was a big change considering that my last four apartments/houses were unbelievably nice. On Monday I move again! This time to an amazing house in Burlington that reminds me of a Hampton retreat. The owner seems like a great person and is such a relaxing soul to talk to. After the year I've had, this is exactly what I needed! This house felt like home before I even walked in. Thinking about it makes me smile.

My year of hurtling through the cosmos is coming to a close. I've learned a lot and have met interesting people along the way. Normal living is on the menu! I can't wait to set up my kitchen and make outrageous food again. I've been thinking about it for so long that I can't figure out what to make! Ahhhhhh! Well, we'll see! Sorry to people who thought that today's post was about food. It was more about food for thought. Anyway, I am so tired that I am surprised this even makes sense. Working 50+ hours and biking 110 miles a week will do that I guess.


Saturday, July 17, 2010

No trabáho, gulpién, no kanén, in-inúten


The title of this particular post holds true to my feelings about a very under-appreciated stew called chili! Last winter I was in downtown Baltimore searching for a restaurant that claimed to have the best chili in town. The restaurant was your typical greasy spoon. If the restaurant looks like this the chili must be legendary! This was hands down the worst chili I ever had. It resembled brown paste with some tomato and unidentified chunks floating in a sea of pain. Luckily I ordered a small bowl, and had to choke down every bite. Prison food in Cambodia probably tastes better.

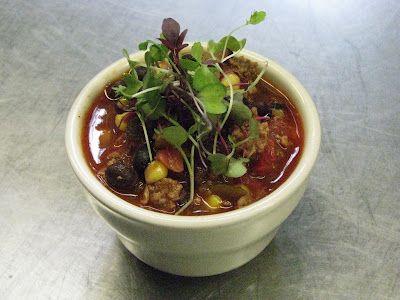
Chili is one of those things that takes you thirty minutes to prepare and hours to cook. Chili also improves with age. At The Tyler Place every Friday is chili day. I start making the stew around seven and let it cook till service time. Every week I am surprised to see five gallons of chili eaten in about 36 hours! Everybody seems to love the chili we put out for lunch. This is definitely not the chili I make at home. But, to accommodate different palates it has to be hot and good! One of our guests loved it so much they requested the recipe, so here it is!

TP Chili

-8 Onions, Diced
-6 Green Bell Peppers, Rough Chopped
-6 Red peppers, Rough Chopped
-.25 Cup Garlic, Minced
-10 lbs Ground Beef
-3 #10 Cans Chopped Tomatos
-3 Cans Chopped Green Chili
-1 #10 Can Black Beans, Rinsed
-3 Cans Chipotle Peppers Pureed
-1 Bag Frozen Corn
-1 Cup Chili Powder
-.50 Cup Smoked Paprika
-.25 Cup Cumin
-.25 Cup Granulated Sugar
-4 Cups Tequila (optional)

In a heavy bottom stock pot brown the ground beef. Once browned remove from the pot and ladle any leftover grease. With the pot still on the fire add the onions, peppers and garlic. Cook until the onions are translucent and the garlic is aromatic. At this point add the tequila and reduce by half. Add the browned meat and the remaining spices. That's it! Let it cook for hours. Adjust your seasoning toward the end of the cooking process. If you get too aggresive with the seasonings in the beginning the chili will be too strong. Remember, liquid reduces and concentrates flavors.


My Chili

-8 Red Onions, Sliced and Grilled
-6 Green Bell Peppers, Roasted and Rough Chopped
-6 Red peppers, Roasted and Rough Chopped
-5 Jalapeno Peppers Sliced
-1 Cup Garlic, Roasted
-10 lbs Smoked Brisket, Shredded
-3 #10 Cans Chopped Fire Roasted Tomatos
-3 Cans Chopped Green Chili
-1 #10 Can Butter Beans, Rinsed
-4 Cans Chipotle Peppers Pureed
-5 Ears of Corn Grilled w/ Kernels Removed
-1 Cup Chili Powder
-.50 Cup Smoked Paprika
-.25 Cup Cumin
-.25 Cup Granulated Sugar
-4 Cups Tequila (optional)


As the title says. If it's work, do it fast. If it's food eat it little by little.

Enjoy!

Thursday, July 15, 2010

Oh, my my!


I seem to have a love affair with berries as of late. At this point, summer is in full swing and the local berry scene is raging! I tend to hoard berries and make any kind of jam, jelly or sauce I can think of. These have a million uses, and if you process them the good times will last well into the winter. I love opening jars of jam and remembering picking the fruit, the weather on that day, sometimes even the smells. You know, real next level shit. About two weeks ago we had the last flat of berries from Sam Mazza's farm here in Vermont. They were delicious! I could have sat there in the walk-in eating berries for hours. Let's savor the flavor and make strawberry jam! Jamming is very easy. It's surprising to me that people buy that junk at the supermarket, or worse spending a fortune on a small jar of berries from who knows where.

Start off by either picking your own berries, or buy high quality local berries. Support your local farmer! You definitely want to stay away from those nasty Driscolls spray painted berries. To make great jam you need great berries! You want about three quarts of strawberries without the stem and rough chopped. Next add one package of pectin to eight cups of sugar and toss to incorporate. Add this to the chopped berries. Put the whole mess in a heavy bottom saucepan over medium heat. You want to stir this frequently, the strawberries can scorch and ruin your project. You will see the strawberries releasing their liquid and a bright red sauce forming.
During the cooking process, there will be a bright pink foam forming on the top of the bubbling berries. Using a ladle skim as much of this off as you can.
At this point you want to have a couple of quart size jars clean and sterilized. For good measure I preheat the oven to 200 degrees and place the jars inside. this ensures that you have eliminated any possible critters lurking inside the jars. Have a tall stock pot with water on the stove over high heat until boiling. When the water is boiling take the jars out of the oven and begin to fill each jar 1/4 " from the top. Wipe the rims of the jars clean and close until finger tight. If it's too tight the jars may crack. Place the jars in the boiling water bath and process for eleven minutes.
Be sure that the water covers the tops of the jars. After the processing time passes, carefully remove the jars from the water and let stand until room temperature. Don't be surprised if you hear a hiss and a ping a few minutes later. That's the jars sealing! When they are at room temp tighten the lids and store it until you need it! It's a very rewarding experience to produce such high quality jam. It's even more fun if you make a day of it with friends. Everyone leaves with some jam and a smile!

So now that the jam is done, it is snack time! Everyone was working so hard in the kitchen that day. You can tell that this is our halfway point of the season. Everyone seemed to be on autopilot. This is when I like to surprise them. Downstairs in our dry goods room there were two cases of peaches! I love peaches!! How about grilled peaches, creme fraiche and honey! This was so easy. Have a hot grill ready. Cut your peaches in half and remove the pit.
Brush the insides of the peaches with a little butter and place on the grill.
This won't take long at all so be careful! I think it took about two minutes to heat and mark the peaches.
Ideally, you want to use mascarpone or ricotta but creme fraiche works too. Put a spoonful in each half and drizzle with some warm honey.
This has so many different possibilities! That peach is screaming for ice cream. Who knows, maybe next week! I think the next surprise snack will be grilled flatbread with bleu cheese, red grapes, rosemary and honey!