Thursday, September 30, 2010

Tell me what you eat, I'll tell you who you are. ~Anthelme Brillat-Savarin


This is one of my favorite quotes for many reasons. Over the years, I have been fortunate to meet a vast number of people from every walk of life. The one trait we all have in common is our love of food. It doesn't matter if you are a carnivore, vegetarian, vegan or other. There is always something you believe in your heart to be special with absolute conviction.

During the last few weeks I have met a wonderful soul who has impeccable taste, razor sharp wit, and a vision of how food can change the world. These kinds of people are very hard to come by in todays "now" society. She understands the benefits of sustainable foods on a very local level, and tragic practices of the large scale corporate farming sprawl. I feel truly fortunate to know a true foodie. After all, great minds think alike!

The kitchen at home has been very happy and unbelievably busy! Each morning I wake up at sunrise, make my coffee which resembles mud, and gaze at the the joyful bounty which is my refrigerator! The pickling projects are mostly completed, and the meat fabrication was a success! Let's see, where to start....

OK! When my sister and I were growing up there was always something good on the table for dinner. In my family we appreciate the togetherness of having a family dinner. One of our mainstays was frank and bean casserole. My sister and I loved it because it was good, hot and plenty of it! Over time, the allure of the hot dog lost it's luster. Maybe Im getting older, but mass-produced hot dogs shouldn't be eaten by anyone! Hand-made all-beef franks reclaim the idea of what a hot dog should actually be!

Hot dogs are perhaps the world's most widely known sausage. The homemade variety are so different from those sold in supermarkets that we have to question the name. First, you need to start with good wholesome ingredients. I had a six pound beef bottom round from LaPlatte, and four pounds of short ribs from the same location. Short ribs have a thick succulent fat cap that adds so much flavor to this sausage. Cut the round into small pieces,remove the bones from the ribs, and cut them in the same fashion.


Once the meat is cut and ready, place it in an accommodating dish, cover and refrigerate for thirty minutes. If you have the time, put it in the freezer for fifteen minutes longer. Bottom line, you want the cut beef as cold as possible.

While the meat is chillin, mise en place your spices! This amount required......

8 Cloves Garlic, Pickled and Minced
4 Tablespoons, Kosher Salt
1.5 Tablespoons, Cracked Black Pepper
1 Tablespoon, Smoked Paprika
1 Tablespoon, Ground Coriander
2 Teaspoons, Ground Mace
3 Cups, Cheap Beer
Sheep Casings

Grind the meat on the smallest die.


In a large bowl, or mixer, incorporate the spices and beer to the ground beef. Once it is properly mixed, cover and put in the freezer for fifteen minutes. During that fifteen minutes, rinse and prepare the sheep casings.


Set up your sausage maker. Whatever you do, never buy the sausage maker from a name brand "authority" on this. They will DEFINITELY RIP YOU OFF!! Go to Amazon.com before making a purchase just to be sure.

Thread the casings onto the extruder and fill the canister with the raw product. This is where you should take a step back, breathe and have a nice glass of wine. You can never be too relaxed in the kitchen. Gordon Ramsey has nothing on me!


Roll out the sausage until the filling has run out. At this point, decide on how you would like to present them. The world is your oyster! Foot-longs, short links, cocktail? You be the judge!!


This recipe will net you a lot of hot dogs! Wrap or freeze properly! If you have a vacuum sealer, well....

Just think, you got some dawgs to make any New Yorker proud!!

Hot dogs are all fine and dandy, but let's get into some pickles!

I have found over time that you can pickle just about anything. There are quite a few recipes that are borderline shady on the internet, but the Ball Blue Book on canning is my new favorite authority on the subject! These are tried and true concoctions for ANY home canner! You will be surprised at what you will find hidden inside this book.

Let's just say I have about 48 heads of peeled garlic. I know it sounds funny, but seriously.......

Have your garlic peeled and waiting! Rev up the canner and process your jars. In this case it is 1.5 gallons. Pickled garlic is extremely delectable and crazy precious! If you take anything away from this blog, this is it!! Besides 48 heads of peeled garlic , you will need.....

2.5 Cups, white Vinegar
1 Cup, White Wine
1 Tablespoon, Kosher Salt
1 Tablespoon, Sugar
1 Tablespoon, Oregano

Bring this to a boil in a large stock pot. Once it is boiling, add the garlic!


Fill the sterilized jars to .25" from the top! Process in a hot water canner for ten minutes.


These are the best garlic pickles ever!

Enough typing for today! There is so much more material it isn't even funny! Tomorrow we will cover pickled peppers and pineapple!! I need to eat food again! Prep is good fun, but making a meal is a whole different story!

~Cheers!

Saturday, September 25, 2010

The Happy Kitchen!


These days I seem to have a lot to be happy for! Our season has come to an end at The Tyler Place and I have been catching up on all the little things that were left by the wayside. Upon my departure from work we were able to clean out the coolers and spice racks! I came home with an amazing amount of vegetables and dry goods. There is only one catch though! My daily home kitchen workload skyrocketed! There is a food game my friend Misha played when faced with a similar challenge. If she can find a way to preserve or cook the food in a proper amount of time, she wins! If the food spoils, well..... You know! Yesterdays project was set to include making strawberry jam, pickled onion (my favorite!), avocado ice cream and tomato soup. The first item seems to be everyones favorite.... Tomato soup!

When I left work there were so many tomatoes left over! Some didn't have long to live so I rescued them, and gave them a much better fate than a slow cooler death. First, take the stems off all the tomatoes and wash using cold water.

You can be very random with the next step. Some people have to meticulously cut perfect squares. There really is no need. Once the tomatoes are cooked you'll never know! Heat a heavy pot large enough to accommodate the tomatoes, and add a splash of good olive oil.


Turn the heat up to medium/high and add the tomato.


I used twelve cups of chopped tomato for this recipe. We need to build onto this flavor by adding four cups of diced white onion,fourteen cloves and two cups of water.


When you hear the tomato water start to boil gently stir the mixture to incorporate all the flavors.


After about twenty minutes go by the rough tomato soup should be almost complete. Turn the heat off and run the mixture batch by batch through a food mill. If you don't have a mill you can use a colander or just shove the whole thing in a blender. But what fun is that?


At this point the soup is vegan friendly! You can stop there if you wish, or you can intensify the flavor a little more and improve the consistency by adding roux and spices.

Roux is equal parts butter and flour. For a batch this size I used one stick of butter and one-half cup of flour. Melt the butter in the same pot you were cooking the tomato in. When the butter is completely melted add the flour.


Cook the roux over medium heat for only a few minutes. When you're set, add about one quarter of the hot tomato soup. Whisk this pretty fast so it won't clump together.


Add the remaining soup and bring to a slow simmer for five minutes. Remember to whisk vigorously. If the soup is a little clumpy don't worry! To finish the soup add two teaspoons of salt and sugar. Put the soup into your favorite container or throw it into a bowl with some popcorn on top!


The flavors are so fresh and the texture is velvety smooth! This is the perfect fall soup! Store bought canned soup has nothing on this! This is a very simple recipe and it is very precious.

Whew! I won round one! Ian- 1 Food- 0! The next project is a little more tricky, but I feel confident! After all, who doesn't like strawberry jam? There were two whole cases of strawberries in the cooler at work that were way past their prime. You want to pick through the strawberries to ensure there are no rotten or fuzzy berries going into the mix.

For a 2.5 quart batch I used twelve cups of strawberries, six cups of sugar, six tablespoons of lemon juice and 58 grams of pectin. Once you have all of your ingredients scaled out and ready, prepare your preserving jars and lids. I place the jars inside the canner while heating to sterilize them. After I take the lids and put them in a small sauce pot and bring to a simmer.


When the water starts to boil in the canner, add all of the ingredients for the jam in a large pot over medium heat.


While this is heating be sure to stir so the bottom doesn't scorch. Bring the whole mixture up to a hard boil. Be careful, boiling sugar can be very dangerous! I can't tell you how many times I have gotten burned by molten sugar. It's one of those burns that you remember for a long time!

Boil for about five minutes, then turn off the heat. Remove the jars from the canner and dump the water back into the pot. Place the jars on a padded surface and begin filling the jars until there is .25" headspace. Be sure not to overfill.


With a damp towel wipe the rims of the jars and set the lids on top. When tightening the bans, do it ever so gently. Put them in the canner and process for ten minutes. If the water isn't boiling when you put them in, don't worry. Start the timer when it boils. After the time is up carefully remove the jam and place on a towel to rest. That's it!! This is much better than the store bought jam. The best part is, you know exactly what went into it! Nothing shady!

Since there were a few extra sterilized jars laying around it was time to make my all-time favorite! Pickled onions! While the strawberries were processing I grabbed my Japanese mandolin and sliced ten cups of red onion, scaled out four cups of red wine vinegar and sliced three cloves of garlic.


Put the red wine vinegar and garlic in a large pot and bring to a heavy boil! Be careful, this time of year fruit flies will be lining up outside trying to get in! They go crazy for my pickled onions!


After it been boiling for a few minutes add the onions and cook for five minutes.

This recipe is enough for 1.5 quarts of goodness! Fill the jars the same way you did the strawberries and put them in the canner.


This was definitely a happy day in the kitchen. I just looked at the scoreboard and it was a total blowout! Ian- 3 Food- 0 It is very satisfying to preserve your own veggies and jam. This will give you months of good wholesome food. There is so much more I can type right now! I have been at it now for a little while. Tomorrow I will give you the scoop on the avocado ice cream! Tomorrow comes sooner than you know it! The list consists of pickled habaneros, jalapenos, red and yellow peppers and sauerkraut! Stay Tuned!!


Cheers!!

Wednesday, September 15, 2010

Changing Gears!

Well, I said it a few weeks ago, the seasons are changing and we are rapidly approaching the fall/winter season. The seasons here in Vermont sneak up on you. Like the old timers say,"If you like the weather now, wait ten minutes." We are lucky to have hit 55 today! The fall in New England is my favorite! The smell of wood stoves and mulled cider permeate the air, and all I can think about is slow cooked food. During the summer I was making vegetable cassoulet for the guests at The Tyler Place. This was so out of place in the season! Can you imagine eating cassoulet on a 95 degree day? Skip the food and just give me a heat stroke! To my surprise, veggie cassoulet caught on in a big way! This dish prides itself on being hearty and very filling! The recipe you are about to read is very, very rich! If you are on a diet, your computer screen may catch fire by the time you finish reading this! So, here we go!

There are so many variations to this dish it's amazing! My basics are chicken/duck, pork belly/bacon and fresh garlic sausage. Today, I'm using roasted chicken, seared pork belly and hand made garlic sausage. First you need to season and roast one chicken. Keep it simple! Truss the chicken, rub with olive oil, season and roast at 350 for 1.5 hours.


While the chicken is roasting, cut the pork belly into 1" squares and render in a small rondo.


You want the pork belly to be browned on all sides. The color should be dark but not burned! Remove the pork from the pan. In a separate container pour the fat off leaving a small amount left in the pan. Reserve the fat for the panko. We'll cover this later.

Keep the heat high and add one sliced large onion and five stalks of celery sliced. Saute this in the pork fat until golden brown. Remove this from the heat and let rest. Now it's time to work on the sausage. Prepare your meat grinder.


Dice five pounds of pork shoulder and grind on the smallest die.


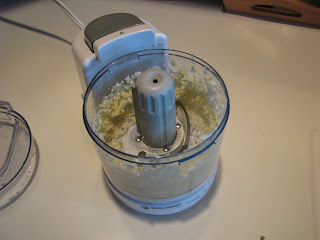
The ratio for garlic sausage is five pounds of ground pork with three tablespoons of fresh garlic and three teaspoons of salt. My new best friend is my mini-prep.


Add the garlic, salt and one cup of red wine to the ground pork.


Once it's mixed, refrigerate for at least one hour. This gives it time to mingle and get comfortable with the the other ingredients. While it's resting, rinse ten feet of hog casings to make sausage. I always rinse it out twice and soak in tepid water for thirty minutes. When you are finished, set up your sausage maker!


Pack the stuffer with the garlic pork mixture and roll it out. Once it's finished, make individual links as described in the "Meat Candy" post from last month.


If you made it this far have a glass of wine! You deserve it! At the moment my new favorite wine is a Louis Jadot, 2007 Pinot Noir.


Now that everything is close to being done, shred the chicken with your hands. Pour off the fat from the chicken and save! If you freeze it, this stuff will last until the apocalypse. Once the chicken is shredded, quarter eight mushrooms and set aside.


The next part is one of my pet peeves. Using a store bought foil roasting pan is great, but it should last you at least a year! If you take care of it, the pan may last even longer! So many people just use them once and just throw it away.

Next step is to set the chicken, sausage, onions, mushrooms and celery back into the roasting pan. Pour in one cup of white wine, two cans of white beans(drained, and rinsed) and one large can of fire roasted tomatoes.


Cover with foil and bake for two hours at 375. This is just the first part of the process. After two hours are up, keep it covered and let it sit on the counter until room temperature. Place it in the fridge overnight so the flavors can meld.

The next day heat the oven to 375. Using a pair of tongs, remove the sausage and sear hard in a shallow rondo while the oven heats. In the same covered roasting pan cook the cassoulet for 1.5 hours. Slice the sausages and set aside.

Take the veggie, chicken and pork mixture out of the oven, let it rest for ten minutes and spoon it into your desired vessel. In this case it is an oversized soufflé cup. This recipe serves at least eight and is very heavy. I don't think you will have to worry about second servings with this one.


Reheat the fat from the pork belly in a small sauce pan. When it is hot, kill the heat and add enough panko till it resembles wet sand. Spoon this over the top and bake for 10 minutes at 375.


I think everyone in the world has heard of "Stick to the ribs," kind of meals, but this is a stroke waiting to happen. One and a half cups is all the human body can handle of this evil concoction.. Just think of it as the tasty little minions of Satan in a cup.

~Peace!